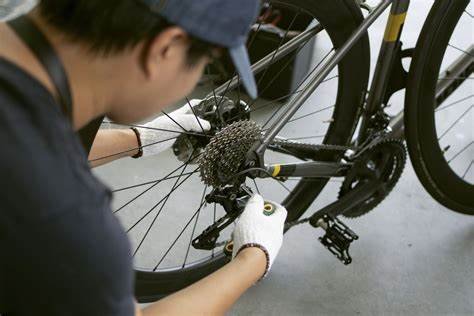
Mountain biking is thrilling, but to keep your bike in top shape, regular maintenance and repair are essential. Proper care not only extends the life of your bike but also ensures safer rides. Here’s a step-by-step guide on how to maintain and repair your mountain bike.
1. Regular Cleaning
A clean bike functions better and lasts longer. After each ride, especially in muddy or dusty conditions, wipe down your bike to prevent dirt buildup.
- How to clean: Use a soft brush, water, and mild detergent to clean the frame, chain, and components. Avoid high-pressure water, as it can force dirt into sensitive parts like the bearings.
- Post-ride wipe down: For light cleaning after dry rides, use a microfiber cloth to remove dust and debris.
2. Lubricate the Chain
Lubricating your chain ensures smooth pedaling and prevents premature wear. A dry or rusty chain can cause issues like chain slippage or breakage.
- How to lubricate: Apply bike-specific lubricant to a clean chain. Wipe off any excess oil to avoid attracting dirt.
- When to lubricate: Lubricate after cleaning your bike or after riding in wet or muddy conditions.
3. Inspect the Brakes
Good brakes are critical for safe riding. Check your brakes before every ride to ensure they’re responsive.
- Disc brakes: Ensure your brake pads aren’t worn out, and the rotors are clean. If the pads are thin, replace them immediately.
- V-brakes: Check the alignment of the pads against the rim. Adjust if necessary to avoid uneven wear.
4. Check Tire Pressure
Proper tire pressure affects your bike’s performance and comfort. Low pressure can lead to punctures, while overinflation reduces grip.
- How to check: Use a tire gauge to measure the pressure. Follow the manufacturer’s recommendations, which are often printed on the tire’s sidewall.
- When to check: Check before every ride, as tire pressure can fluctuate with temperature changes.
5. Tighten Bolts and Screws
Loose bolts can lead to mechanical failure during a ride. Regularly check all bolts and screws, especially those securing critical components like the handlebars, stem, and saddle.
- Tools needed: Use a torque wrench to tighten bolts to the manufacturer’s recommended specifications.
- Where to check: Focus on areas such as the headset, stem, cranks, and seat post.
6. Maintain the Suspension
Your bike’s suspension system absorbs shocks and provides a smoother ride. Without proper care, the suspension can wear out or malfunction.
- Suspension fork: Clean the stanchions and check for signs of wear. Lubricate them regularly and service them as recommended by the manufacturer.
- Rear shock: Inspect the seals for any leaks, and ensure it’s operating smoothly. Follow the manufacturer’s service intervals for a full suspension rebuild.
7. Adjust the Derailleur
A poorly adjusted derailleur can lead to difficulty shifting gears, chain slippage, or gear skipping.
- How to adjust: Use the barrel adjuster to fine-tune cable tension. If the derailleur is out of alignment, adjust the limit screws to prevent the chain from falling off.
- When to adjust: If shifting feels sluggish or the chain doesn’t engage the gears smoothly, it’s time for an adjustment.
8. Inspect the Chain and Cassette
A worn chain or cassette can damage your drivetrain. Regular inspection will help you identify signs of wear and replace components before they cause further issues.
- How to check: Use a chain wear indicator tool to measure chain stretch. If your chain is stretched beyond the recommended limit, replace it. Inspect the cassette for worn or chipped teeth.
- When to replace: Replace your chain after every 2,000–3,000 miles or if it shows significant wear.
9. Replace Worn-Out Parts
Mountain biking can be hard on components. Regularly inspect your bike for worn-out parts and replace them as needed.
- Common replacements: Brake pads, tires, chain, and cables often need replacing after heavy use. Ensure you use high-quality, bike-specific parts for replacements.
- When to replace: If parts are visibly damaged, cracked, or not functioning as they should, replace them before your next ride.
10. Repairing a Flat Tire
Flat tires are common but easy to fix. Knowing how to repair one on the trail can save your ride.
- Tools needed: A tire lever, spare tube or patch kit, and a pump or CO2 inflator.
- Steps:
- Remove the wheel and deflate the tire.
- Use the tire lever to pry the tire off the rim.
- Inspect for punctures and remove any debris.
- Replace the tube or patch the hole, then reinsert the tire and inflate it.

11. Straighten a Bent Wheel
A bent wheel can occur after hitting rocks or obstacles. A wobbly wheel affects handling and may cause brake rub.
- Tools needed: A spoke wrench.
- Steps: Locate the bent area and use the spoke wrench to tighten or loosen the nearby spokes to correct the wobble. If the wheel is severely bent, take it to a bike shop for truing.
12. Store Your Bike Properly
When you’re not riding, store your bike in a dry, sheltered area. Avoid leaving it in direct sunlight or rain, as these conditions can damage components and lead to rust.
- Indoor storage: Hang your bike on a wall rack or store it in a stand to keep it off the ground.
- Long-term storage: If storing for an extended period, clean and lubricate your bike first, and periodically check the tires to prevent flat spots.
Conclusion
Regular maintenance and quick repairs are essential for keeping your mountain bike in prime condition. By staying proactive with cleaning, inspecting, and replacing worn parts, you can ensure your bike performs well on every ride and avoid costly repairs down the road. Happy riding!


